🎯 Swing Model
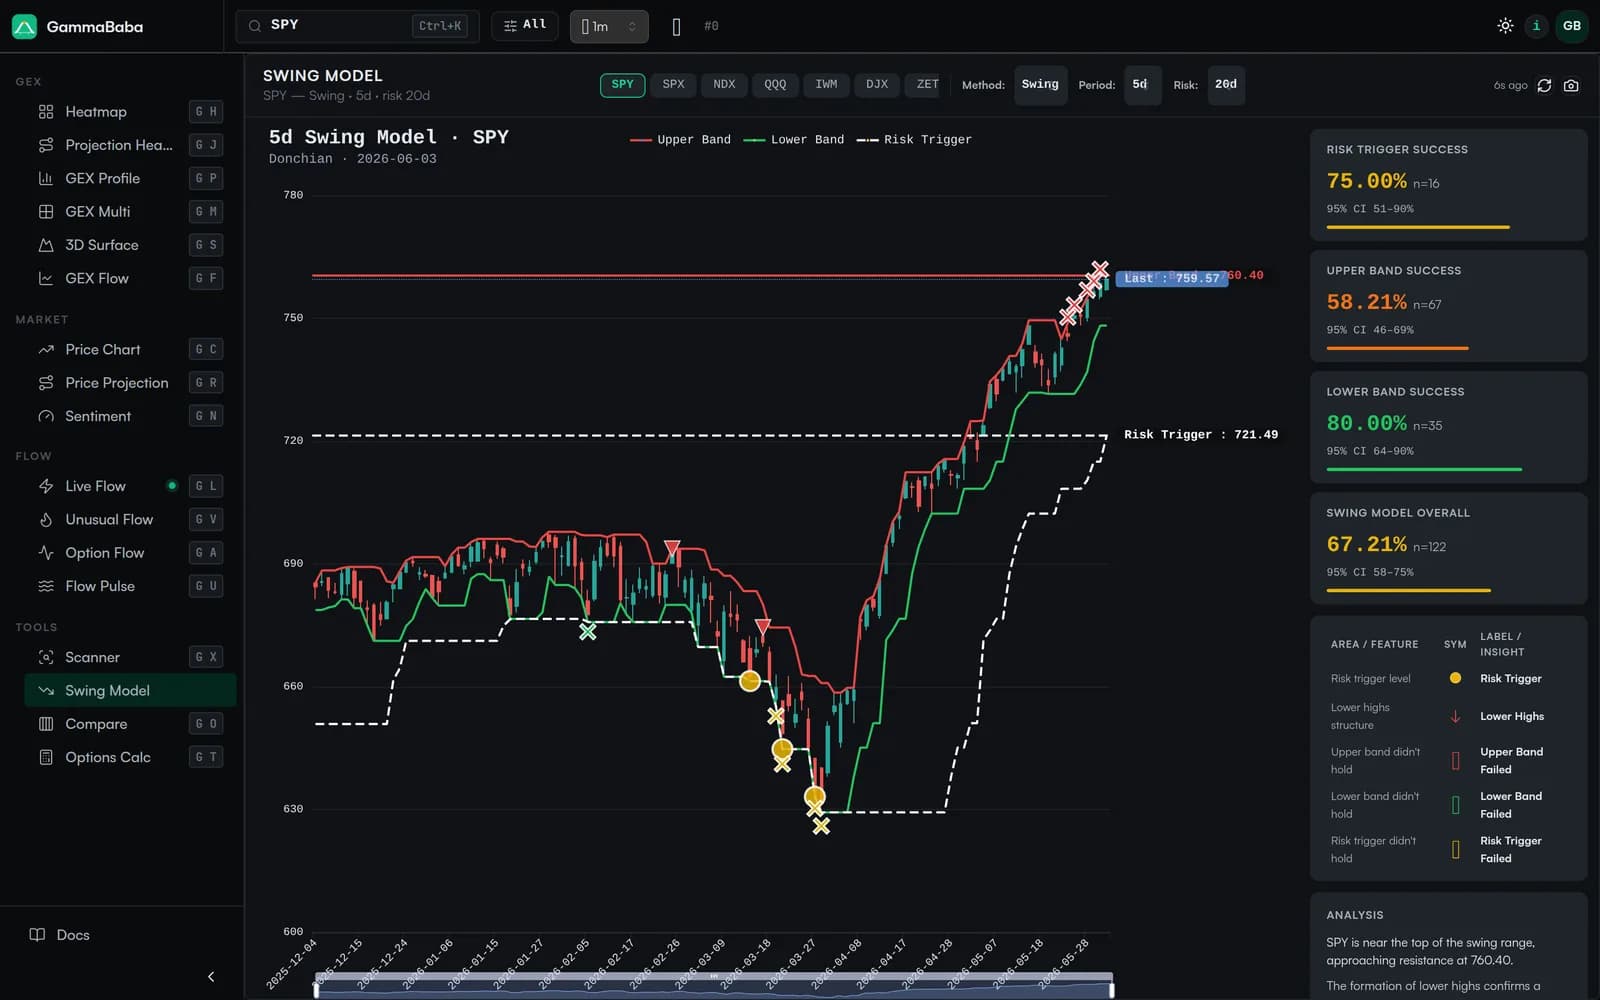
The Swing Model overlays our proprietary breakout bands and a rolling risk-trigger line on the price chart, then scores each one against history. Instead of guessing whether a band will hold, you see the backtested hit rate for upper-band, lower-band and risk-trigger events — each with a sample size and a 95% confidence interval — so you can judge how much weight a level deserves before you act on it.
How It Works#
The model draws two breakout bands from a rolling lookback using our proprietary swing methodology: an upper band at the highest high and a lower band at the lowest low of the chosen period. A separate risk-triggerline tracks a tighter level that flags when a move is at risk of reversing. As price interacts with each level, the Swing Model records whether the event “held” (the band or trigger did what it implied) or failed, and rolls those outcomes into the hit-rate panels on the right.
Controls#
- Ticker — SPY, SPX, NDX, QQQ, IWM or DJX.
- Method — Proprietary breakout bands (highest-high / lowest-low envelope).
- Period — Lookback length in days used to build the bands (e.g. 5d).
- Risk — Rolling window used to compute the risk-trigger line and the backtested hit-rate stats (e.g. 20d).
Reading the Chart#
- Upper Band — The breakout level above price; a hold here suggests momentum continuation.
- Lower Band — The breakdown level below price; a hold here suggests support is intact.
- Risk Trigger — A dashed line that marks where the current swing is most exposed to reversal, with its level shown on the chart.
- Markers — On-chart symbols flag events such as lower-highs structure and band or risk-trigger failures; the legend table maps each symbol to its meaning.
The Hit-Rate Panels#
The right-hand panels turn the backtest into plain numbers. Each card shows a success rate, the sample size it was measured over (n), and a 95% confidence interval so you can tell a robust edge from a small-sample fluke.
- Upper Band Success — How often an upper-band interaction resolved as expected.
- Lower Band Success — How often a lower-band interaction resolved as expected.
- Risk Trigger Success — How often the risk-trigger line correctly flagged a reversal.
- Swing Model Overall — A blended hit rate across all tracked events for the current settings.
- Analysis — Plain-text commentary describing where price sits in the swing range and what recent structure implies.