📈 Chart View
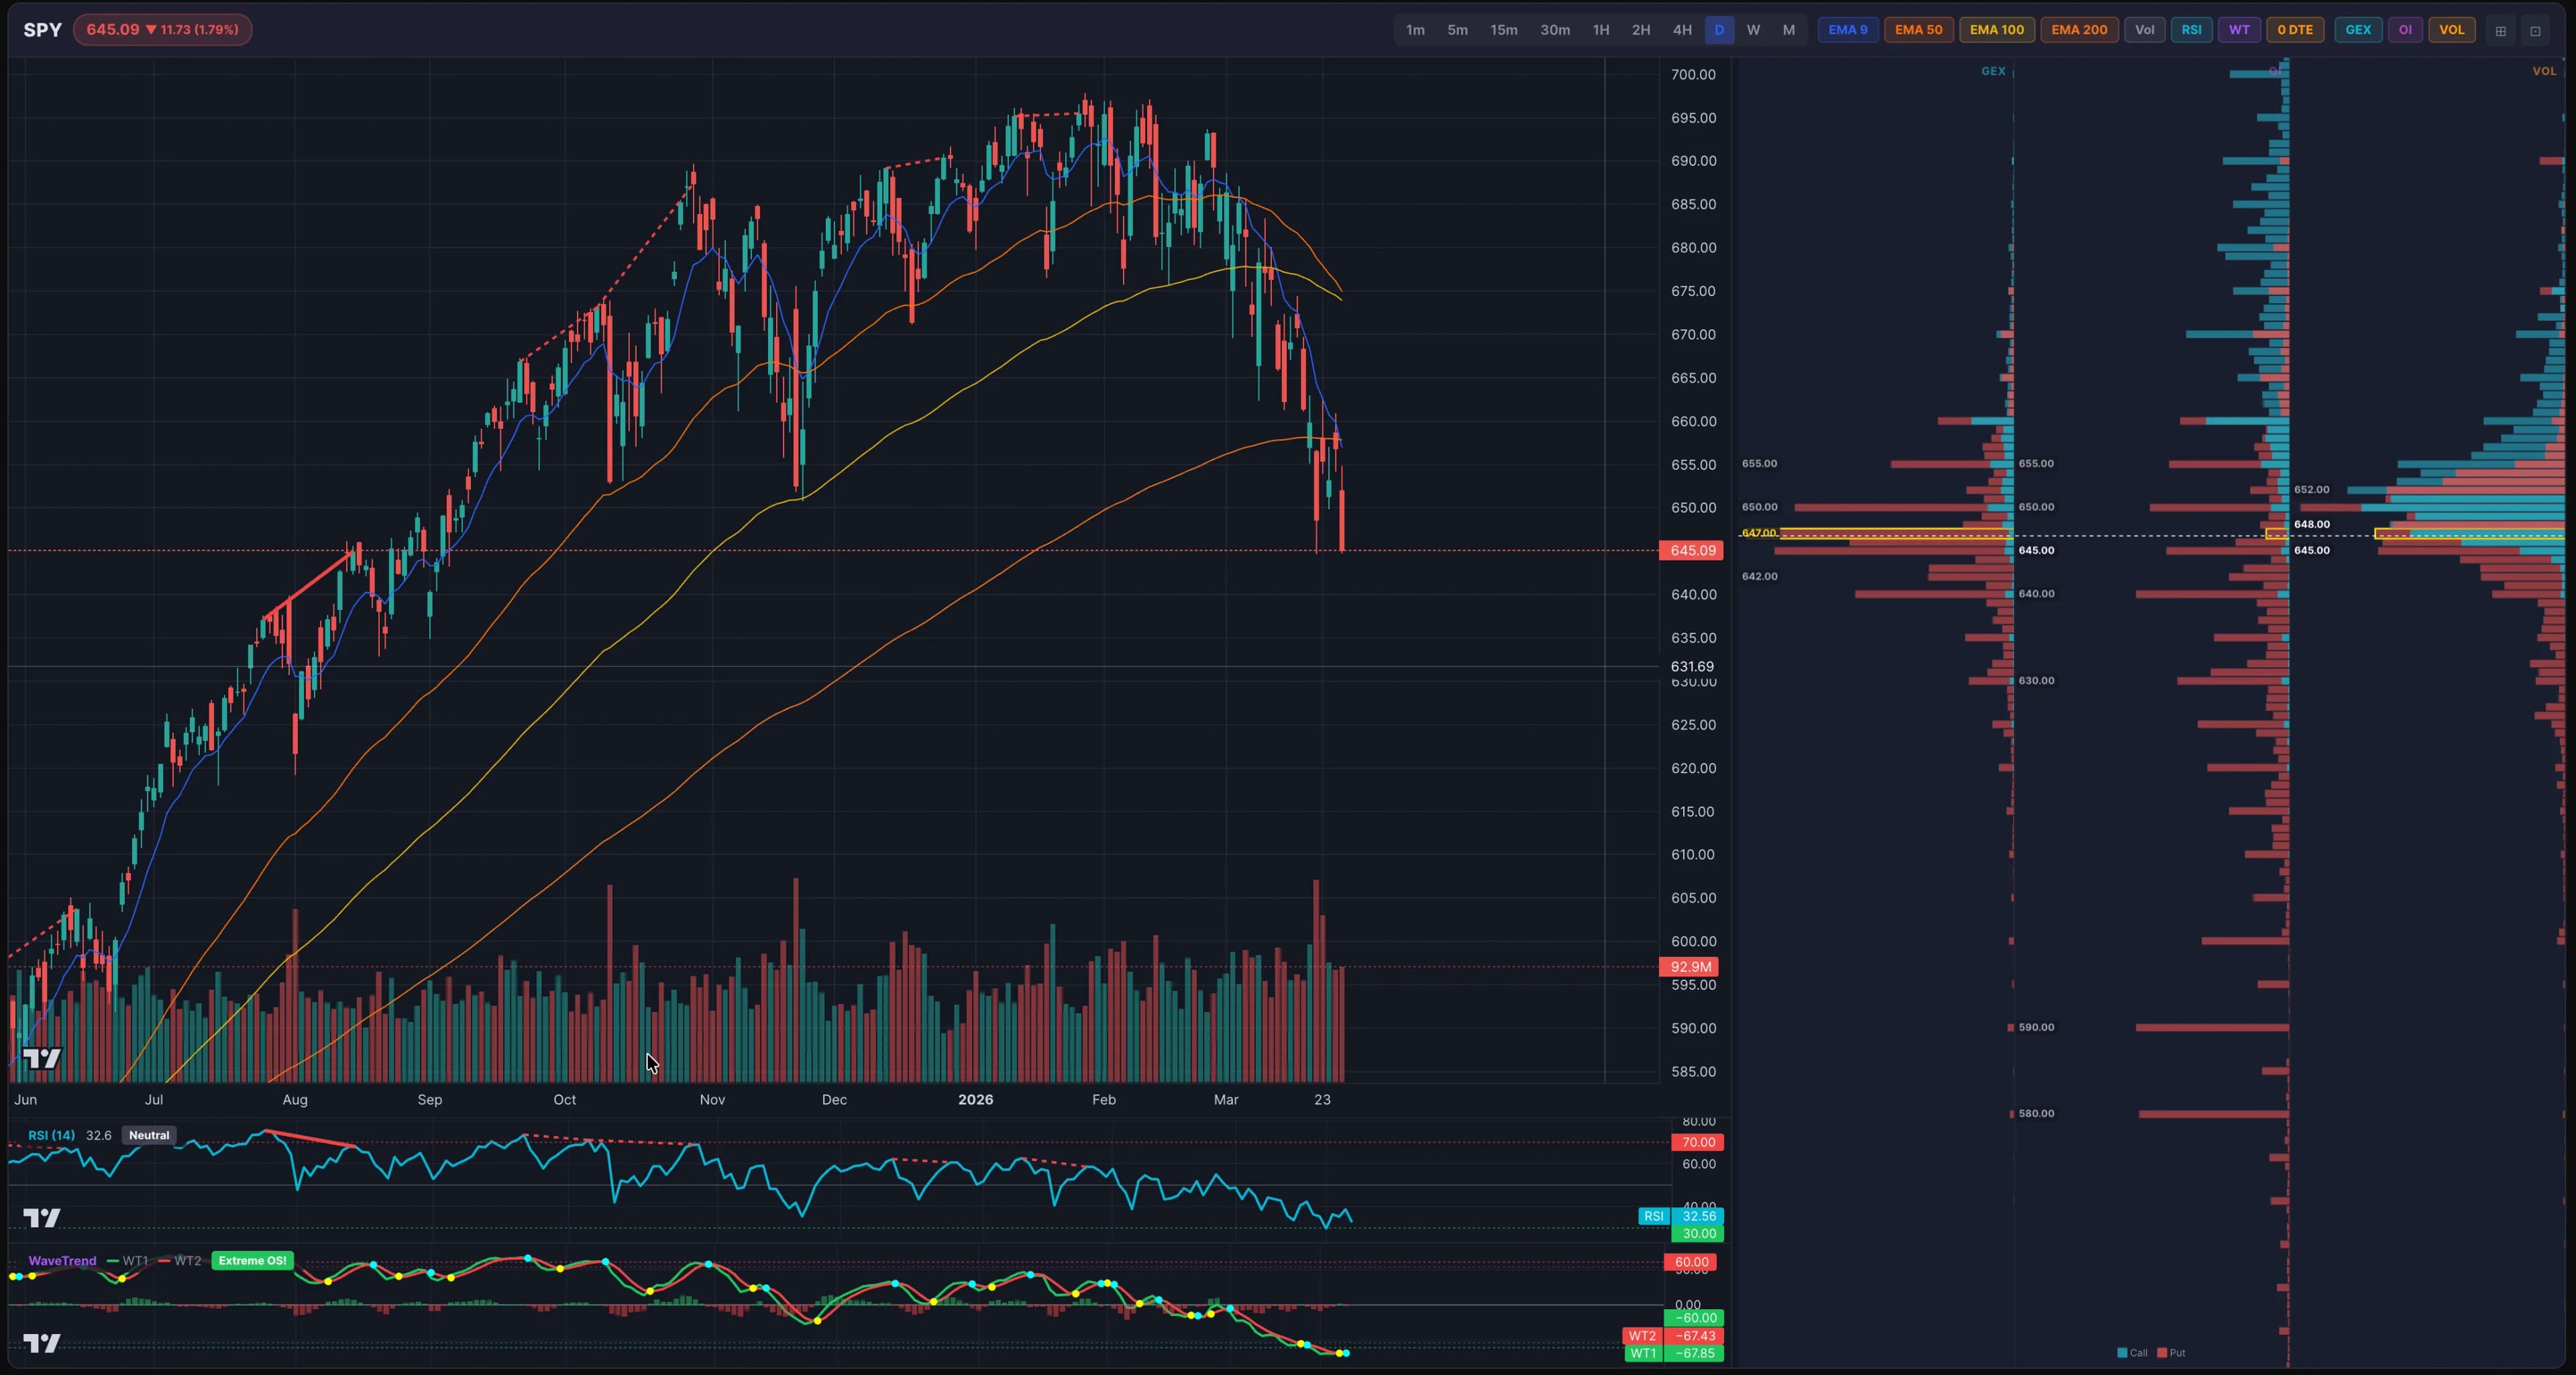
Chart View puts price action and gamma exposure on the same canvas. Candlesticks, volume and technical indicators sit alongside the key GEX levels — dealer walls, the gamma flip and the highest-gamma nodes — so you can watch how price behaves as it approaches the zones where dealers are most likely to hedge.
Overview#
Chart View renders a TradingView-style candlestick chart. The same GEX levels you see on the heatmap are plotted as horizontal lines directly on the price chart, giving you a combined view of price action and dealer positioning. A toolbar above the chart controls the interval, EMAs, indicators, level overlays, and the GEX, OI and Volume side-profile views.
Chart Intervals#
Choose from multiple time intervals to view price data at different granularities:
- Intraday: 1m, 5m, 15m, 30m, 1h — real-time candle updates during market hours
- Daily and above: 1D, 1W, 1M — for broader context and trend analysis
Intraday intervals show data from the current trading session (or most recent), while daily and above show historical candles going back several months.
GEX Level Overlays#
The core feature of Chart View is the GEX overlay — key gamma exposure levels plotted directly on the price chart as horizontal lines:
- King Strike — The strike with the highest absolute GEX, displayed as a prominent line. This is the primary level where dealer hedging pressure is concentrated.
- Gamma Flip point — The price level where net GEX transitions from positive to negative. Marked with a distinct color to indicate the boundary between stabilizing and amplifying zones.
- Top GEX nodes — Additional high-GEX strikes are plotted as secondary levels, helping you see the full landscape of dealer positioning on the chart.
Technical Indicators#
Chart View includes several built-in technical indicators that you can toggle on or off from the chart toolbar:
- EMA 9 / 50 / 100 / 200 — Exponential Moving Averages for short-term to long-term trend context. Each has a distinct color and can be individually toggled.
- Volume — A volume histogram below the candlestick chart, color-coded by candle direction (up/down).
- RSI (Relative Strength Index) — Displayed in a separate panel below the main chart. Shows overbought (> 70) and oversold ( < 30) zones.
- WaveTrend — A momentum oscillator shown in its own panel, useful for identifying momentum shifts and potential reversal zones.
GEX Side Profile#
On the right side of the chart, a side profile displays a horizontal bar at each strike, aligned to the chart's price axis. This gives you a quick visual read of where gamma, open interest and volume are concentrated relative to the current price.
- Toggle between three profile views from the toolbar: GEX (net gamma by strike), OI (open interest), and VOL (day volume). Calls and puts are color-coded so you can see the balance on each side at a glance.
- The profile panel is resizable — drag its edge to adjust the width.
- A 0DTE filter can be toggled to remove same-day expirations from the profile when you want to see longer-dated positioning without intraday noise.
Price Projection#
The companion Price Projection view extends the chart into the future, mapping a GEX magnet path across upcoming expirations. For each expiry it estimates the strike that gamma positioning is most likely to pull price toward, then connects those targets into a path with a probability cone around it.
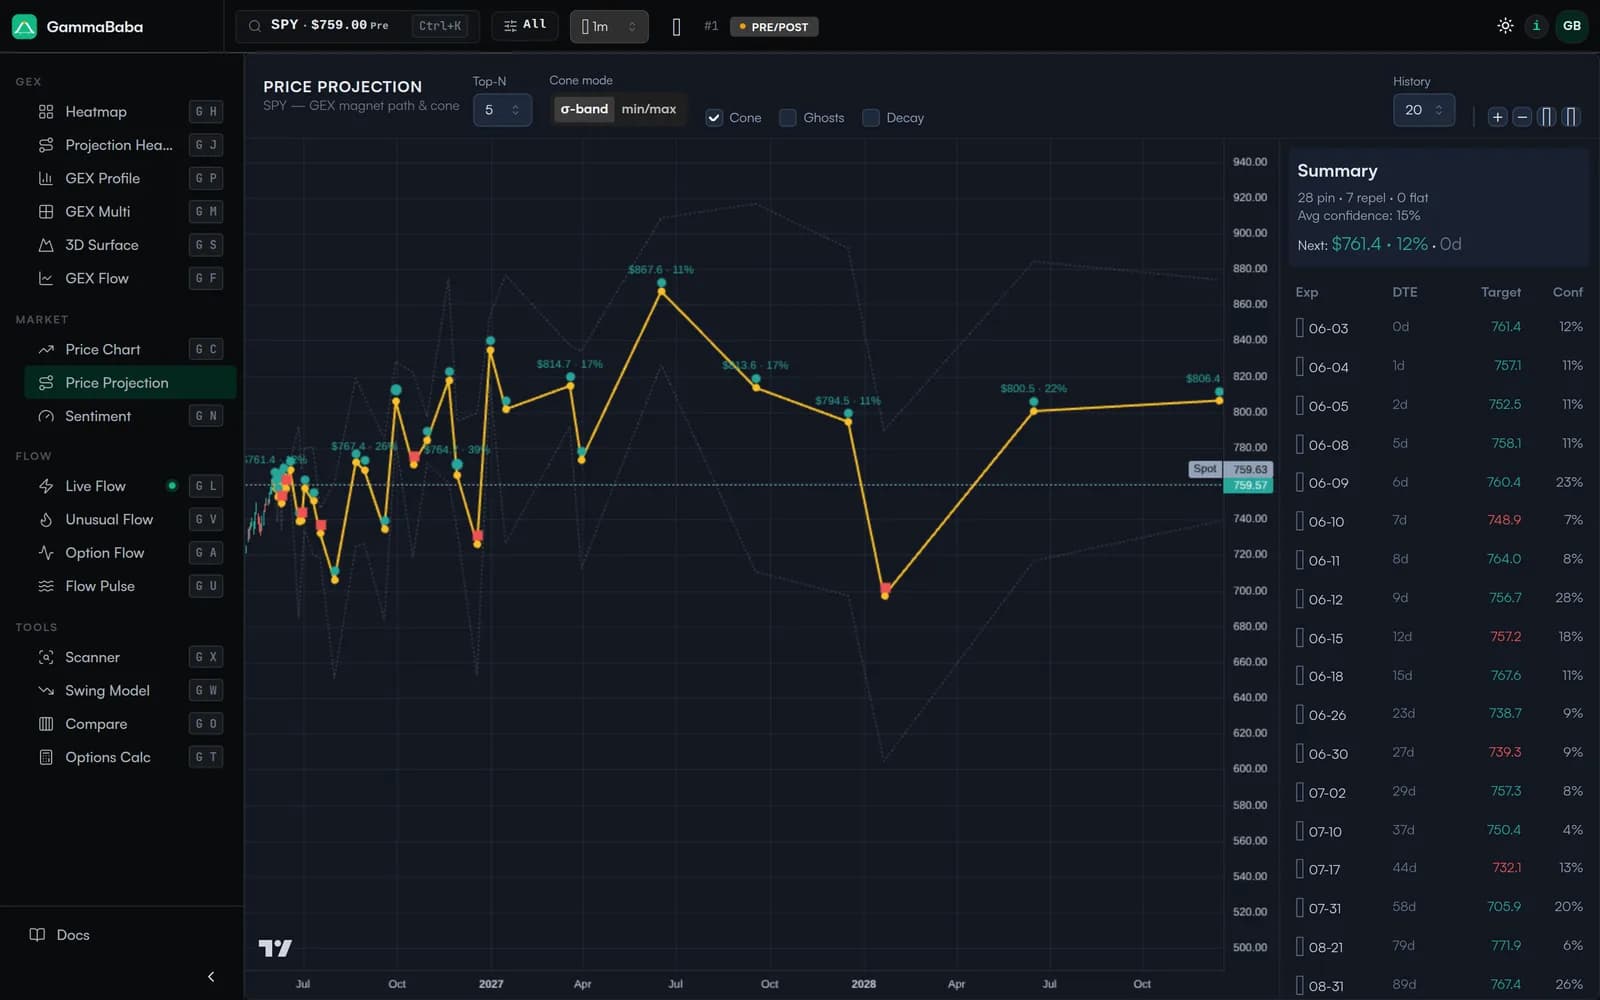
- Each node is labeled with its projected target and a confidence percentage, and classified as a pin, repel or flat outcome based on the surrounding gamma structure.
- Switch the cone between σ-band (a standard-deviation envelope) and min/max bounds, and adjust how many top strikes (Top-N) feed the path.
- A summary panel lists every expiration with its DTE, target and confidence, so you can scan near- and longer-dated magnets side by side.
Fullscreen Mode#
Click the fullscreen button in the toolbar to expand Chart View to fill the entire screen. This is especially useful for detailed chart analysis where you want maximum visibility of both the price chart and GEX levels.
Chart Controls#
- Scroll — Zoom in/out on the time axis
- Drag — Pan the chart horizontally and vertically
- Reset — Click the reset button to auto-fit the chart to show all visible data
- Crosshair — Hover over the chart to see OHLC values, volume, and indicator readings for any candle