📊 GEX Profile
The GEX Profile turns the heatmap into a single, scannable column: net gamma exposure by strike for the expirations you select, with spot price, the gamma flip, and the call/put walls marked right where price has to react to them. It is the fastest way to read the dealer-positioning landscape before a session — and a built-in summary panel translates the chart into plain English so you do not have to.
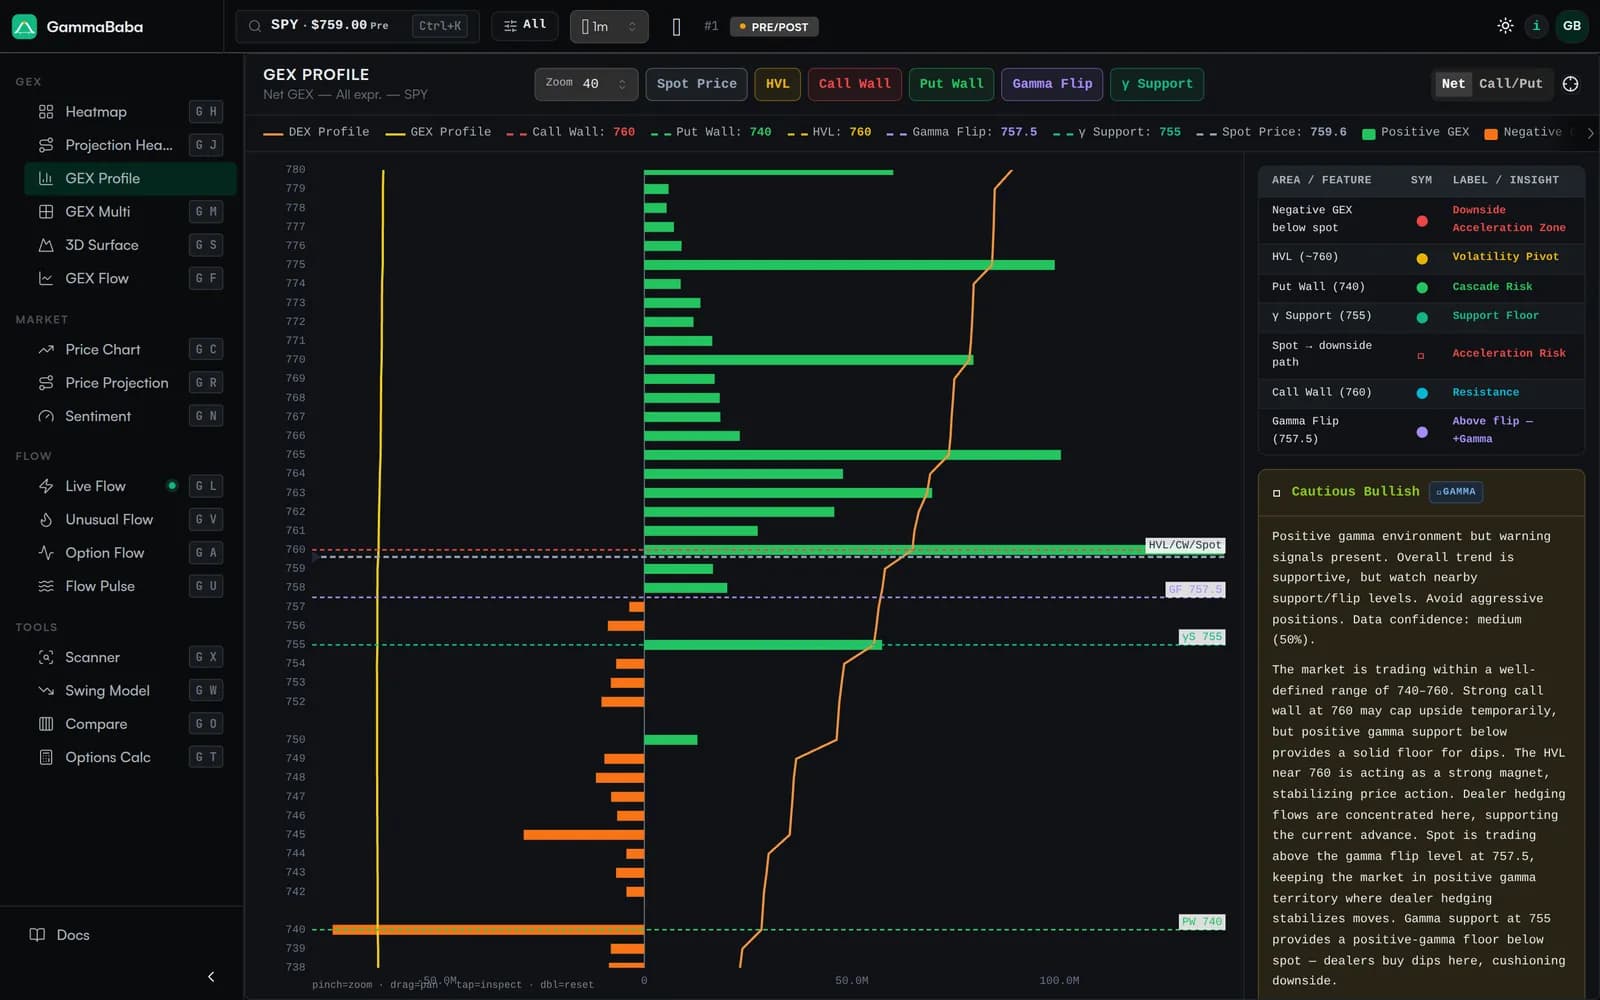
What You See#
- Horizontal bars — one per strike, length proportional to net GEX concentrated at that strike. Strikes run top to bottom, so the profile sits alongside price.
- Positive GEX (green) — strikes where dealers are net long gamma. These tend to dampen moves as price approaches.
- Negative GEX (orange) — strikes where dealers are net short gamma. These tend to amplify moves and accelerate trends.
- Spot line — marks the current price across the profile, so every level is read relative to where price is now.
- Structural levels — the Gamma Flip, Call Wall, Put Wall, HVL (high-volume / volatility pivot level) and γ Support are labeled directly on the chart and can be toggled from the header.
- GEX and DEX overlays — line overlays trace the cumulative gamma (GEX) and delta (DEX) profiles on top of the bars for added context.
Net vs. Call/Put View#
A toggle in the header switches between two readings of the same data:
- Net — one signed bar per strike (call gamma minus put gamma), the cleanest read of where dealer hedging pressure concentrates.
- Call/Put — splits each strike into its call-side and put-side gamma so you can see which contracts are driving a level rather than only the net result.
The Regime Summary Panel#
Alongside the chart, a side panel translates the profile into a plain-English read of the current environment — a regime label (for example, "Cautious Bullish"), a confidence note, and a short narrative explaining the trading range, where the walls sit, and how dealer hedging is likely to behave around spot. A compact legend maps each level to its meaning, such as the Put Wall as cascade risk or γ Support as a positive-gamma floor.
Clicking a Strike#
Click any bar to open a popup with the contract-level breakdown at that strike: call / put open interest, gamma, premium, and implied volatility. On touch devices, tap a bar to inspect, pinch to zoom, drag to pan, and double-tap to reset.
When to Use It#
- A quick pre-session check — where are the walls above and below current price?
- Confirming a heatmap read with a simpler, single-column view.
- Pairing with the Price Chart to map each profile level onto the tape.
- Judging the regime: is spot above or below the gamma flip, and how far are the nearest walls?